Joomla to WordPress: Many people use Joomla to administer their sites. Joomla is a good and popular platform, but its administration can be somewhat more complicated for you than WordPress. Especially, if this is your first site and yet there is no experience in working with CMS.
Today we will tell you how to make a site transfer from Joomla to WordPress and not spend a lot of time on it.
8 Steps to Import Site from Joomla to WordPress
1. The first and important step is to create a backup copy of your site. Take for yourself the rule of always making backups before making important changes to the site.
2. We take as a basis that you already have hosting with WordPress installed. Go to admin panel WordPress >> Plugins >> Add a new one . Install and activate the plugin FG Joomla to WordPress.
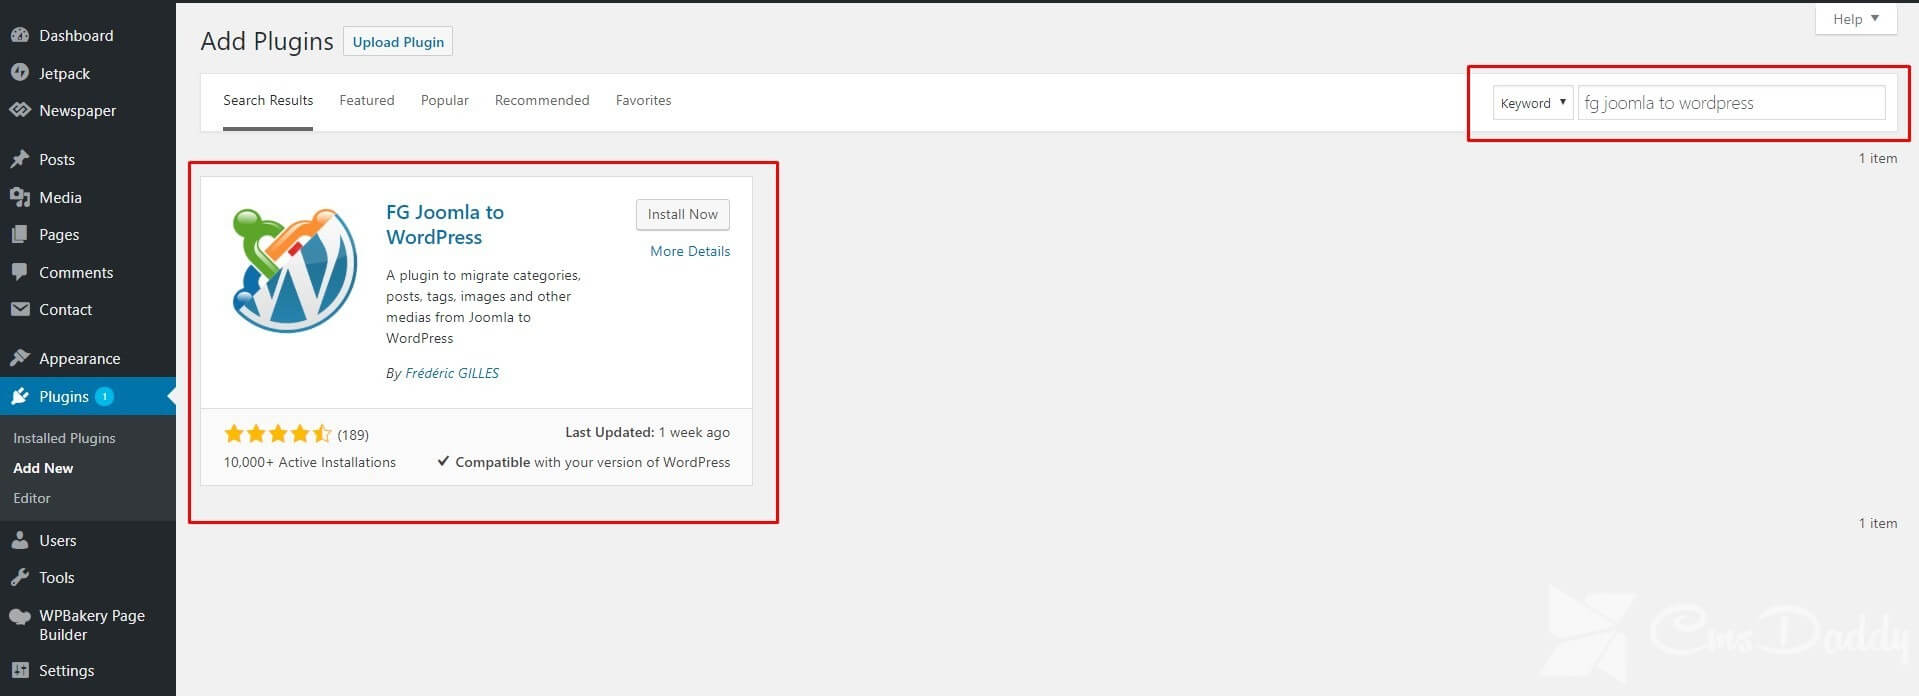
With this plugin you will be able to:
- move Joomla sections in the WordPress category;
- Download all media files in the correct WordPress directory with the ability to change the images for the settings of WordPress settings;
- Save Title and Alt for images;
- migrate tags;
- move Joomla publications as posts or WordPress pages.
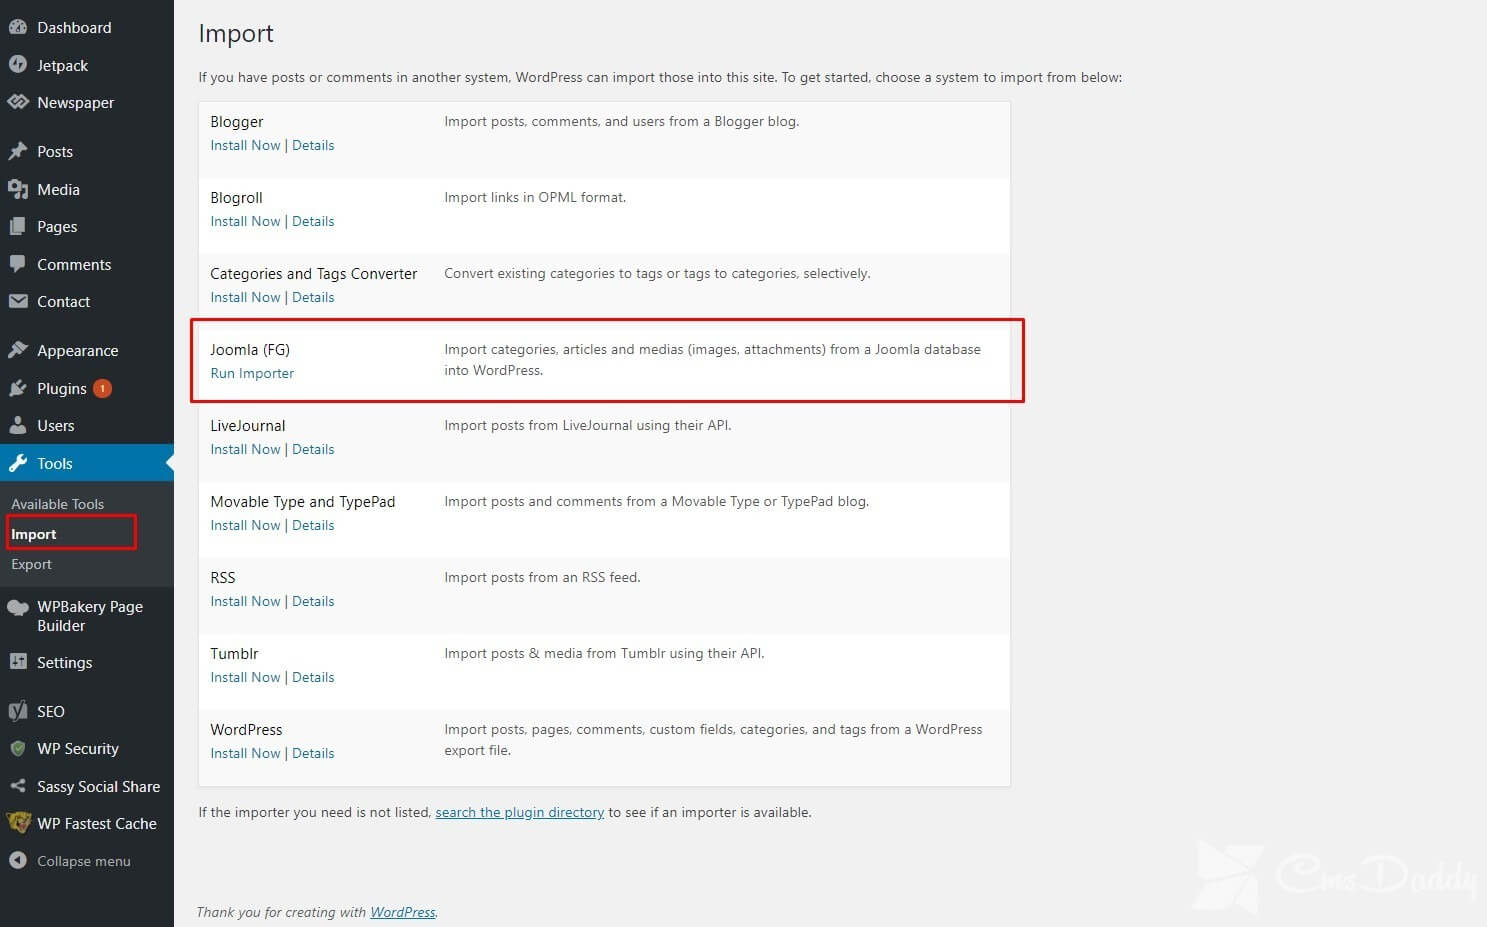
3. After you have activated the plug-in, open the Tools menu >> Import. Choose Joomla (FG) from the proposed tool list.
4. On the importer page, you need to add information about your Joomla site and the database for it:
- URL of the live Joomla website – link to your site
- Hostname – most often it’s “localhost” or “127.0.0.1”
- Port – port for MySQL, usually 3306
- Database – the name of the site database on Joomla
- Username – the user for the specified database
- Password – the password for the specified database
- Joomla Table Prefix – prefix database table Joomla
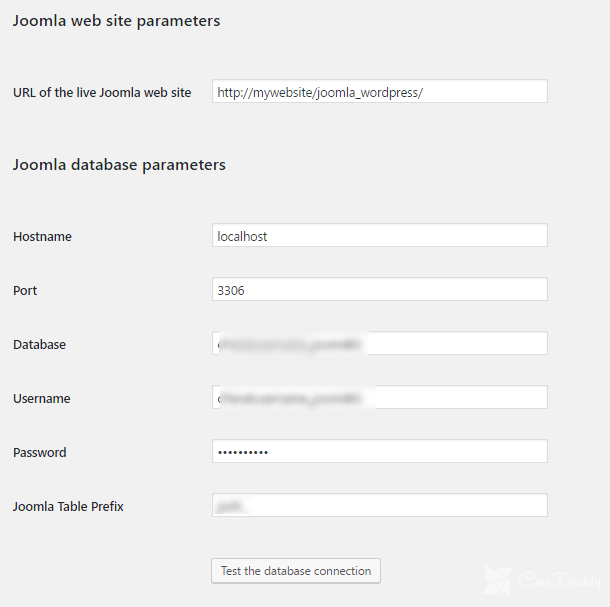
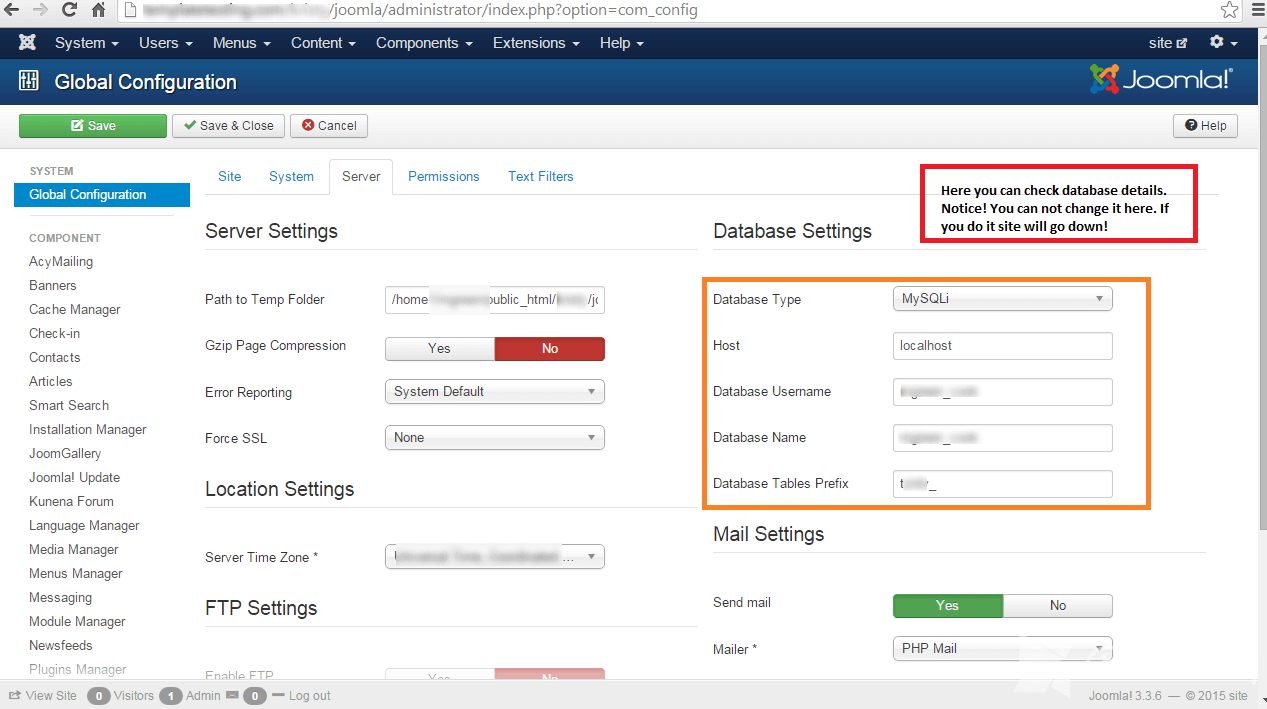
You can find information about the Joomla database in the configuration.php file, which is located in the root directory of your site on Joomla.

Also, details about the database are in the Joomla Administrator panel >> System menu >> General settings >> Server tab.
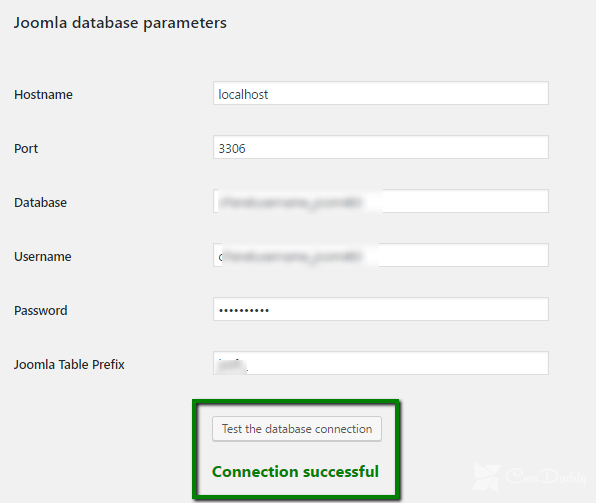
5. After you have entered all the details, click the “Test the database connection” button. If all the details have been entered correctly, you will see a message about the successful connection:
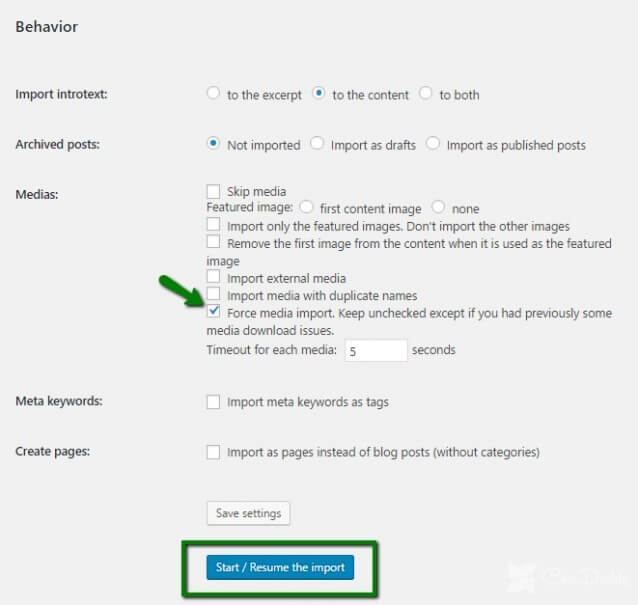
6. After that, scroll to the “behavior” section. If you also want to import media files (for example, images) from Joomla to WordPress, select the “Force media import” option here. Then click on the ” Start / Resume the import “button.
7. The plugin will launch a script to import content from Joomla to WordPress. The length of the process depends on how much content you have on Joomla. Once the import is complete, you will see the following message:
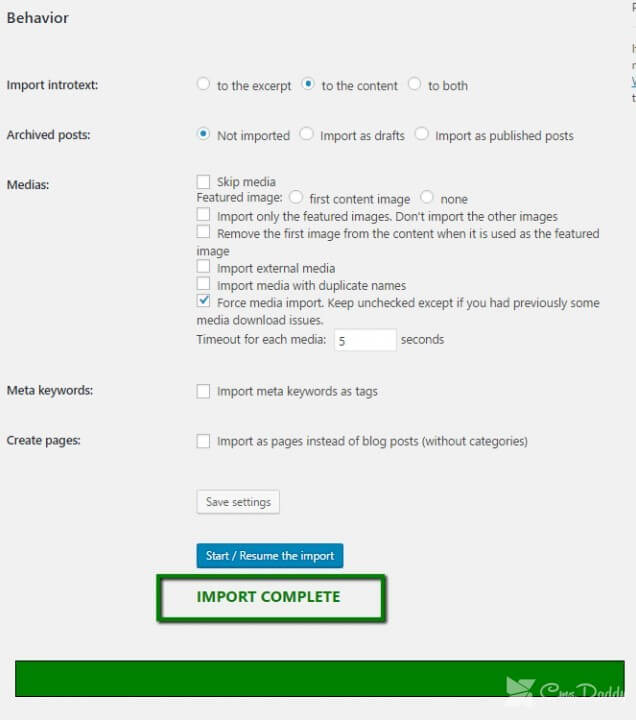
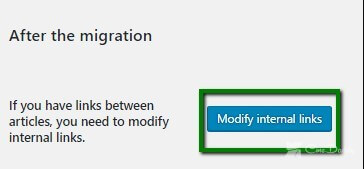
8. And the last step is correcting broken links. Scroll through the importer page and click on the ” Modify internal links ” button.
That’s all! Now your site will work on a simpler and more convenient WordPress CMS.
